
Friday, 20 December 2013
Location Release Contract
This location contract states that I have had permission from the owner of the property for me to use the location.

Music Video first draft
This is the final first draft of my music video; the end scene of both the male and female performer is using the incorrect male however I will refilm this after christmas.
Music Video Draft 1 from Haydon Media on Vimeo.
Thursday, 19 December 2013
The making of 50s costume
I decided to utilise the fact that my mum is a dress maker and rather than purchasing a 1950s outift, I would get her to make one instead. I got her to create a skirt using a dark blue material matching a blue top I already had. In order to get the right idea, I had to research a lot into the sort of fashions and styling of the 50s in order to get it just right. This video is a compilation of both moving image and photographs of the process it took to create.
Production Log - Digipak photoshoot
This evening I have been working on creating my digipak and poster- in order to do this, I decided to create images in the form of a polaroid- linking to the 50s theme- and then I can put these polaroids in different places. In began pegging them onto a tree in my garden once it had gotten dark which gave some really good effects. I then did some shots with two polaroids, one of the male and one of the female, on the grass from a very low angle. Again, this gave a completely different effect. Once completing this, I scattered the polaroids on a table and took a birds-eye-view shot of them. This will then be used for the back cover of my album and I will write the names of the songs on the bottom of each polaroid. To get the images for the polaroids, I simply took screen shots of different sections within my music video. Although they aren't good quality, it does not matter as the images aren't entirely clear and also adds to the old/authentic look.
Actor Release Forms
Actor release forms for my music video, this gives me consent to use my actor's footage within my entire coursework.


Wednesday, 18 December 2013
Raw Footage: Male
Raw footage of the film shoot with the actor of my video, all dropped onto the timeline and premiere and rougly cut up.
Monday, 16 December 2013
Filming/Editing Schedule
Scene One:
Filming - 22nd November 2013, 10-2pm
Editing - 25th - 29th November primarily. Continuing onwards until finalised music video.
Progress: filming of the female performer getting ready. Filmed in the black box studio. All props of makeup and hair products needed and black cloth for the table.
Scene Two:
Filming - 11th December 2013, 3.15-5.30pm
Editing - 12th - 13th December primarily. Continuing onwards until finalised music video.
Progress: filming of the male performer getting ready. Recreation of female's shoot. Filmed in the same location of black box studio. All hair products and costume needed & black cloth for the table.
Scene Three:
Filming - 16th December 2013, 3.15
Editing - 17th - 20th primarily. Continuing onwards until finalised music video.
Production Log - Editing footage
On Friday I receieved feedback about my music video so far and overall it was quite positive. My audience liked the whole idea of it and thinks it will work really effectively.
I was told to try and slow down some of the footage a bit more and some shots did not work. For example, one shot of the male did not look like it was in the right place so I decided to remove this shot entirely and move the rest of my footage along which created a much better effect.

 I also found that some of the footage I tried to recreate had slightly different lighting. For example, the male's foot show was slightly lighter than the females and as they cut one into the other, the lighting needed to look as near to the same as possible otherwise it would look strange. I adjusted the lighting using the 'RGB Curves' effect on Premiere which allowed me to adjust the brightness/darkness of the footage and I could compare these until they were the same.
Although it's not perfect, once I add on the sepia colour over-lay, it will help to adjust out the colours.
I was told to try and slow down some of the footage a bit more and some shots did not work. For example, one shot of the male did not look like it was in the right place so I decided to remove this shot entirely and move the rest of my footage along which created a much better effect.

 I also found that some of the footage I tried to recreate had slightly different lighting. For example, the male's foot show was slightly lighter than the females and as they cut one into the other, the lighting needed to look as near to the same as possible otherwise it would look strange. I adjusted the lighting using the 'RGB Curves' effect on Premiere which allowed me to adjust the brightness/darkness of the footage and I could compare these until they were the same.
 Although it's not perfect, once I add on the sepia colour over-lay, it will help to adjust out the colours.
Friday, 13 December 2013
Production Log - Editing & Other ideas
I am currently working on the editing process of my music video as I filmed more footage with my male actor. Both this and the female shoot need to look as if they are the same thing so in order to do this I focussed heavily on creating the same lighting, location, positioning of the actor etc. I then also recreated some previous shots I had made which audience's would be able to link together which will help them to understand that it is all together and they both tie in within eachother.
As with the female footage, any time I dropped in any footage to Premiere, I instantly slowed it down half speed to keep within the pace and style of the song but kept cutting quickly between all the shots. After editing this section, I realised I am nearing to the end of the song and the section I have left may not be enough to show the extent of the dance routine which will be at the end. After filming the dance routine and editing it, I will may have to delete some sections of footage to allow space otherwise it will not meet the full effect that it should.
I have also been considering adding in small clippets of other footage that will reinforce the idea of my music video of turning back time. For example, these may include an old fashioned stop watch going backwards, or 'I love you' being written on a piece of paper and then replayed backwards or a rose dropping a petal, played backwards. I think these may work really effectively as it would break up the footage I already have and create a clearer message.
Whilst editing, I have also been trying out different colours such as having all the footage in black and white, however, I found that I prefer the colour as for example as the female is doing her makeup, the brightness of the red lipstick is completely taken away and doesn't look as intriguing for an audience member.
Monday, 9 December 2013
Thursday, 5 December 2013
Production Post - Editing first scene
As I have now filmed the first section of my music video, I am currently in the editing process. I have used Premiere many times during other class projects so this wasn't a problem learning to use the software.

The first draft of my music video wasn't the best as all of the shots were very long. After getting feedback I decided to make it much more choppy even though the actual footage is very slow which creates a nice contrast. This way I can change between shots and go back to different shots which looks more effective than it constantly running. In order to make it like this, I began dropping the footage into different layers allowing me to view the footage a lot easier.
I have also been playing around with the colours of the footage; firstly I changed it to black and white which I wasn't fond about because of the vibrant colours from the makeup, I didn't want to take this away from it. However, I think I will stick to adding a sepia colour over-lay to give it a vintage effect.
Friday, 29 November 2013
Production Post - First section of filming
I have recently started to film my music video and edit the footage using Adobe Premiere. As I am acting within the video, I got a fellow class mate to film for me. Whilst filming we used two red head lights, a steady-cam, two Canon 600D cameras and a tripod. All of this equipment allowed me to get the best possible footage.
We filmed the footage at a much quicker shutter speed which will allow me to slow down the footage during the editing process without it looking very jumpy rather than smooth. We then set the lights up and the lights we used allowed us to move them around; this was essential for the shoot as we needed different lighting for when the camera was infront of me, behind me and then during section where I was dancing. Lighting is extremely important and having access to this sort of equipment helped a lot. Also, the lights had a switch which allowed me to adjust the lights and channel the light either in a very small space or a wider space; again, this was extremely helpful as we could then specifically change the lighting to cater the needs of the camera.
Before beginning the filming process we had to ensure the mise-en-scene was perfect. In order to do this, Amy curled my hair using heated rollers which gave a very big, luscious effect fitting with the styling of the time period. Although I did my makeup whilst filming, I also added just a base layer of foundation and mascara so the lighting did not wash me out.
 After filming hair and makeup:
We filmed the footage at a much quicker shutter speed which will allow me to slow down the footage during the editing process without it looking very jumpy rather than smooth. We then set the lights up and the lights we used allowed us to move them around; this was essential for the shoot as we needed different lighting for when the camera was infront of me, behind me and then during section where I was dancing. Lighting is extremely important and having access to this sort of equipment helped a lot. Also, the lights had a switch which allowed me to adjust the lights and channel the light either in a very small space or a wider space; again, this was extremely helpful as we could then specifically change the lighting to cater the needs of the camera.
Before beginning the filming process we had to ensure the mise-en-scene was perfect. In order to do this, Amy curled my hair using heated rollers which gave a very big, luscious effect fitting with the styling of the time period. Although I did my makeup whilst filming, I also added just a base layer of foundation and mascara so the lighting did not wash me out.

Filming
During my film shoot, I set up a camera on a tripod that can film the whole thing- with this footage I then created a timelapse.
Wednesday, 20 November 2013
Production Log - Digipaks
This week I have been working on my digipak and poster design and drafting this so it makes it easier when it comes to creating it. In order to do so, I have been looking at many different examples, the different number of CD's I can put in it, the designs etc. As I was used to the basic, front-back-with two CD's format of album covers, this allowed me to get a better understanding of the different forms I could possibly recreate.
After this, I had to begin thinking of a specific design. As my theme of the album, based upon my music video, is all about nostalgia and turning back time, reflection etc I wanted to keep this throughout. So, I decided to create my poster looking like a polaroid picture, linking to the inside of my cover as being lots of different polaroids pegged onto a line. This will instantly inform the audience's that this is what the album will be about and therefore would indicate the type of music involved, typically love/ballad type songs.
My first draft of the digipak was drawn on paper which I then transformed on the computer by using images from the internet as a basis so I have a rough idea of what I am doing. This will ensure that when I take my actual photos for the digipak, as soon as I am done, I can just drop the real, edited pictures into the already made digipak which will make it much easier.
Some of the digipaks below I really liked, especially the cream one as I felt it had quite an authentic look about it which is how I would like mine to look; also, the images and back cover where it tells you the song names, I feel look really effective.


Monday, 18 November 2013

Friday, 8 November 2013
Wednesday, 23 October 2013
Call Sheet for Test Shoot
This is the call sheet for the test shoot I completed on the 16th of October
Production Log - Feedback
In todays lesson I filmed five people from my class, all of which fit within the target audience of my music video, to give me some feedback on my idea. This way I will be able to get an understanding as to whether it would appeal to them, and if not, any changes I could make that would change their views. I found doing this extremely helpful as some people also gave me ideas on possible shots and editing techniques I could use that will enhance the video to the maximum. As they fall within my target audience it also gives a good opinion from someone it is aimed at rather than someone that isn't.
Monday, 21 October 2013
Production Log - Test Shoot Footage
I conducted a shoot for my music video which was solely 'test-shoots'. This allowed me to play around with the lighting to find out which ways looked best and also the settings on the camera; after editing the footage it also then taught me things I would have to change for my actual film shoot and things that looked good and things that didn't. After filming I edited it all together and used the song 'High Hopes' by Kodaline. Although it was not the actual song I am using for my music video, it is still by the same artist so fits with the theme. I experimented with the positioning of the lights which I found quite difficult to get it just how I wanted it to look. Doing this made me realise I need more of a black background in order to get the effect I would like. Also, I need to move the lights about behind the artist so her face isn't too bright which is what I found some of the shots came out like; also, this turned out to be a certain setting on the camera that made all the shots extremely bright- I now know this for my actual shoot so the shots are as good as they can be.
Whilst editing I found that some of the shots I did, I'd prefer them to be slowed down to fit more with the music so in order to do so I will have to change the camera settings to a faster shutter speed so when I slow it down on Premiere it would still have a good effect rather than looking quite jittery and jumpy. I then decided to create a black and white colour overlay once i'd finished editing so I exported both a colour and black and white copy; the black and white will create the authentic 50's style look that I am going for so when I create my actual music video I will be able to compare both of them and also compare a more sepia/vintage colour overlay as well to see which has the best effect.
Whilst editing I found that some of the shots I did, I'd prefer them to be slowed down to fit more with the music so in order to do so I will have to change the camera settings to a faster shutter speed so when I slow it down on Premiere it would still have a good effect rather than looking quite jittery and jumpy. I then decided to create a black and white colour overlay once i'd finished editing so I exported both a colour and black and white copy; the black and white will create the authentic 50's style look that I am going for so when I create my actual music video I will be able to compare both of them and also compare a more sepia/vintage colour overlay as well to see which has the best effect.
Wednesday, 16 October 2013
Production Log - Presentations of Coursework so far
In class we were set a task to create a presentation of our progress within the course so far under 4 different headings:
1- Our blog
2- Concept of our video
3- Planning so far
4- Next steps
I did this within a powerpoint form so I can have images and some text on the screen and then I could present it and talk in deeper detail to the rest of the class rather than just reading off of a sheet of paper or the actual slides themself. In order to do this task I had to carefully go through my blog, the planning and research tasks required and see what I had left to do- this suprisingly made me realise I had done much more than I thought I had.
In one of our lessons I then presented to the class- I found this a very good oppertunity and was very beneficial. Firstly, I got a much wider range of feedback on my music video idea from a whole class compared to just a few people who I initially asked. Most people really liked the idea and thought that it could work as a music video. I found getting feedback in big masses very helpful so because of this I plan to do it more often- possibly get more people from my target audience age range to see what they think, whether it would appeal to them etc. However I'll do this in a more multi-media form such as filming people on one of the media department's cameras.
Wednesday, 9 October 2013
Production Log - Planning for video
This week I have mainly been focussing on any extra work I could do that will benefit me before filming but isn't within the specification of work we must complete. To start with, rather than creating my album cover straight away I decided to sketch out some possible ideas which I then scanned in. This also gives me a hard copy of ideas that I can always refer back to whilst creating the album cover. I find drawing and writing things out much better for me when doing a project like this however I always ensure that I can upload this somehow so in this case I could scan in my drawings.
I created four different possibilities and even still I am unsure whether I will use any of them; I decided to create two landscape and two portrait. This way it gives me lots of different formats and then I can get audience feedback on what they think will look best- even still, I could create two different versions of the same in my final product. One landscape and one portrait; I would do this because of all the different places you can actually put an advert nowadays such as busstop (portrait) compared to a large billboard down a busy road (landscape) so my advert would accomodate all purposes.
I then decided to create an 'essentials list' whilst filming which I did on Prezi. I split it off into four different sections:
Equipment
Props
Costume
Stylling
This way it is easy to read and see the different elements I will need- I can then refer back to this just before going to film to ensure I have everything as that would be one of the biggest problems for example if I went to film and had forgotten both of the actor's costumes and this would put a big back-lag onto the production of my music video.
Whilst creating my risk assessment this is then something I have considered that I need to make sure I am 100% prepared and ready to film and have everything sorted when I do film or it will not benefit me at all. Because of this chance, I will make checklists for different people such as myself, the crew and also the actors to ensure I have everything I need.
Monday, 7 October 2013
Risk Assessment
I have created a risk assessment so I know everything that could go wrong whilst shooting my music video and things that I could do to minimise these problems from happening.
Permission


Production Log - Storyboarding
This week I decided to create a story board for my music video; this will help me whilst shooting. To start with I used a blank storyboard and began by drawing the pictures of each shot myself. In total I had around 40 shots, each with an individual picture and description of the shot e.g. close up high angle/establishing shot etc. I then went through and arrange the timings of each shot with the help of my shot list; I had to picture what the shot would look like and whether the timing was correct which I should hopefully get some feedback for soon.


Blank Storyboard Storyboard
After drawing all of the images for my storyboard I scanned these into the computer so I had all eight documents into a folder and dropped them into Photoshop. Photoshop then allowed me to cut out each individual image and save it as a separate image so I could then create an animatic. I created my animatic on Adobe Premier which was a good programme as I could then insert all my images and music at once and easily move them around and crop them to the exact timing of the song. I added each image in order to the sequence and changed the timing so it will stay on the screen for the real timing of the music video; this is something I can now always refer back to and then compare with my final music video.
Production Log - Album poster
This week I have finished creating my album poster; I am really happy with this final version but I still need to have my own photoshoot to take the pictures myself which I am planning to do very soon. In order to show my work and progress I have created a camstudio video.
I will then show other members of my class and those slightly older to fit with the target audience of my video and get their feedback. Based upon this feedback I will make any changes that are neccessary.
The first bit of feedback I got was to add something into the background as initially I did not have the image of the scattered polaroids and it was just white- this made it look quite empty and it needed something to fill out the space and a bit more colour. Although I wanted it to look very basic, authentic and vintage, I think the background of a vintage image will finish off the poster nicely and make it just what I want. I brought down the transparency of the image as I found the colours and images were too heavy and took away attention of the text and main image. During my feedback I might ask if I should bring it down even further so much so that you can barely, just about see it; this will make audiences look closer into the poster and a lot more intriguing.
Animatic
Before starting the production of my music video, I created an Animatic; this consisted of drawing out each individual frame, scanning it in and then putting it together with the song of my video in the correct places. I think this will be extremely beneficial when it comes to creating my actual music video as it will give me something I can constantly refer back to to ensure I am on the right track. Also, this gives me a brief idea of what my actual music video will look like, I plan to show this to people that fall within my target audience and try and get some feedback on how they think my video will look once it's filmed and edited together based upon the animatic.
Sunday, 6 October 2013
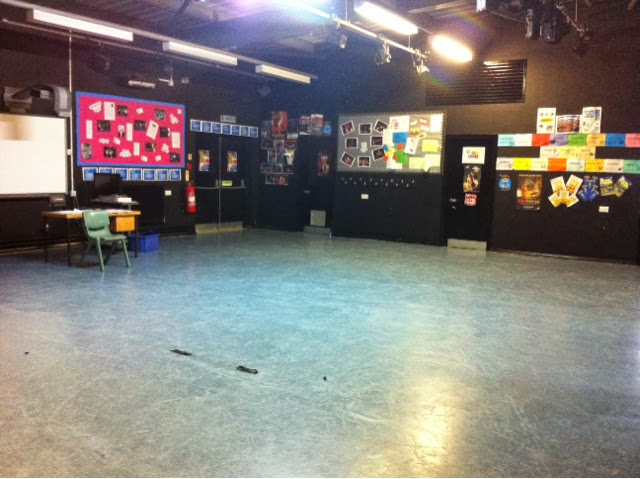
Images of location


I took these images of my school hall and drama studio- I think these will be a good location to shoot in as it is easily accesible if I needed to conduct more than one film shoot. The drama studio will be perfect as it is a black box studio and also has a mirror so I will shoot in front of the mirror. I then can change the lighting to block out anything else in the background e.g. display boards, if needed. Also, I will be able to use a lot of lighting because the media department is just upstairs so I will not have the problem of lugging lots of equipment to a chosen location. The stage within the hall is also a great facillity for me to use; the stage itself is not high at all which would allow me to get low angle shots but then if needed, I could get shots from the same level with the use of the stairs. Also, the stage already has stage lighting rigged up above which I will be able to use- this means that I could have the general lighting on but then also use the media lights to add a bit of brightness to one specific area or actor at a specific moment. All I will need to do to use the hall and drama studio is book it out for the evening which should not be a problem.
Friday, 4 October 2013
Production Log - Shot list
I have mainly focused on my shot list this week- it took quite a long time due to getting the timing correct and thinking of all the different shots I will need. Whilst thinking of the shots to use I wanted to mainly use lots of close ups or extreme close ups; this way, the audience will be able to gain a greater relationship with the characters and therefore sympathise for the female towards the end of the video when they discover the overall message and narrative.
To begin with, I listened to the song repeatedly and had to work out the specific timings; as the song is quite slow paced, calm and relaxing I am able to create slower, less frequent cuts to fit with the music and the lyrics. Some cuts I have included go up to 10 seconds however, whilst filming I will keep the camera off of the tripod so there are some slight movements so that these cuts don't look too still and rigid. Also, because of the movements of the actors themselves, it will keep the shots interesting and therefore the long shots will be a positive and effective aspect rather than a negative.

We already had a template of the shot list that we could just fill in but I added in an extra column with I believe will help me whilst shooting of being 'gender'. Within this column I have written whether the shot is male or female or both- this will help me because if I were to do two separate film shoots, one male and one female, I can easily cross it off and make sure I get every shot I need to which may be accidentally missed if I hadn't done it. Also, it will help me to clarify which shot is which; I can easily scroll down and see the female shots and then just read that specific shot information rather than all of them which will save time which is vital whilst conducting a film shoot.
Production Log - Hair & Makeup Research
This week I have been watching some tutorials on 50s style makeup and hair; this will ensure that when I create my actual music video, I can always refer back to this so I know that it looks as close to typical 50s styling as possible. The specific video I watched and have posted I found really helpful because the styling actually looked like it was from the 50s unlike others I had watched and it also will look good and effective within my music video. After watching this video I decided to try out a hairstyle myself, again, so it is one less thing to worry about when it comes to filming. Another good reason about watching these tutorials so early is that it gives me enough time to buy any props/makeup/hair products needed. For example, some red lipstick, a heavy black eyeliner, hair ties etc.


Whilst considering the hair and makeup styling of my actors, I was also thinking about possible costumes whether it being anything I personally owned myself, any past costumes from dancing performances, anything any of my friends owned or material and patterns which would allow me to make something. In the end I think the easiest option will be for my actress to use her own 50s outfit she has as it is easily accessible and I know for definite that it would fit. The styling will be the main element of my music video I need to focus on to ensure it fits within the time period as this will be the main image style and help the audience establish the time it was set.
Cam Studio - Poster
Here, I took a recording using the software CamStudio which allowed me to record my work. I decided to hide all the layers on the first draft of my poster and reveal them all one by one.
Wednesday, 2 October 2013
Monday, 30 September 2013
Proposal
Monday, 23 September 2013
Lyric Notes
I decided to print out the lyrics of 'Love Like This - Kodaline' which I could then analyse and write all over, this will give me a clearer understanding of the song and any deeper meanings itself which I can then incoporate within the sub-text of the video. This also will help me to decide whether or not to use this song and if it's right for my intentions.


Friday, 20 September 2013
Monday, 16 September 2013
Mood Board

How will this help for my music video?
My moodboard will help me as all of the different images are based around either the artist of my song, the genre or images of performances/festivals etc linking to the audience of my music video. All these images will create one overall image of my music video and help someone to establish the main overall idea if they were to look at it.
Exisiting Music Channels

MTV
MTV +1
MTV HD
MTV Live
MTV Live HD
MTV Music
MTV Base
MTV Hits
MTV Dance
MTV Rocks
MTV Classic
The channel now doesn’t focus mainly on music videos but also other programs, documentaries etc.

.svg/200px-Viva_(UK_&_Ireland).svg.png)
VIVA:
Viva is afree channel to air and was first broadcast on 1st December 1993 in Germany. It is owned by MTV but led by Time Warner, Polygram Records and EMI Music. DoRo Productions were hired in order to design the channel and they were the producers of very notable music videos by bands such as Queen and The Rolling Stones. It was initially made because record labels where angry by MTV’s decision to air mainly English-speaking language music videos to the German markets. Viva then allowed German musicians to play their music and this spread worldwide. Viva now runs across Europe in Austria, Germany, Hungary, Ireland, Poland, Switzerland and of course the UK.

4Music
4Music is a music channel based in the United Kingdom and was launched on the 15th August 2008 replacing ‘The Hits’ therefore making it relatively new. There were many promotional adverts played for the big launch of this new music channel and since then it has proven to be highly successful. T4 on the beach then become 4Music, the Channel 4 Stage at V Festival changed to 4Music etc. The channel launched at 7pm and began with ‘Davina and Steve’s 20 Big Ones’.
How will this help for my music video?
This will help me with my music video because I will gain a greater knowledge of the typical markets there are for music videos and the sort of music which is played on these channels and I can then therefore decide where abouts my music video would be played and this will help with the overall style of the video.
Audience Research
How will this help for my music video?
Researching the audience for my music video is the most important element as everything must be aimed at them and for them. Also, I have decided that my music video could possibly have both a primary and secondary audience which gives me a broader market to appeal too. Similarly, knowing the specficics of the audience such as the percentage of women to men/what they would like to do/their class etc are all things I would have to consider whilst shooting and planning for the video. For example, as there would be a greater female market then male, it needs to appeal more to females or the video wouldn't get the views and overall success it should. Going down to the fine detail of what shops they would shop in will also help me for the styling of my music video- although this may not apply directly to my own video due to the era I am setting it in.
Equipment
 Canon 550D
 I will be using this camera to shoot my music video firstly because it is accessible to me through the media department and also because I think it will give me the quality shots that I need/want for my video. Using this camera also means that I can shoot in HD which will be essential for me as I will be creating shots such as spraying a can of hairspray, and if I light it properly then you will be able to see the partciles. Also, I feel comfortable and familiar using this camera after using it for previous media tasks such as my AS coursework creating a magazine. Using this camera I will also be able to easily change the settings to create different depths of focus, I can aim on focussing on different elements of the my actors and also as it is digital, I can store all of the footage on one memory card which I can then easily transfer onto my computer ready to place into Premiere and edit.

 Studio Lighting
I will have access to different forms of lighting I will use in my video- one of which being ones I can set up myself and move around so they are exactly where i'd like them to get the perfect lighting for my shots. These lights will be extrememly helpful as I can move them around as much as I would like to; If I dont like the lighting in a particular shot I can easily move them. Also, in my location of the black box drama studio, there are lights already rigged onto the ceiling and positioned in particular locations. Although I would not be able to move these, I can easily adjust the brightness and position my actress within the lights again to create the best possible shot I can.

Editing Software
After shooting my music video I will need to edit it all together. Luckily, in our media department I have access to a wide range of softwares that I can use which will create easy, simple yet effective editing. Firstly, I will use photoshop or indesign to create my digipak and edit any photos I may have taken. As I have used photoshop multiple times before, I will feel comfortable using this software and and therefore will hopefully get good results from it.

To edit my actual footage, I will use Adobe Premiere. Again, I have used this programme before and therefore will not waste any time familarising myself with it. It is a very easy programme to drop clips into and edit. I am not the best with adding lots of different effects and movements etc so I think this will suit my purpose perfectly and won't be too complicated.
 After editing my music video together, I will use Adobe After Effects to add on a layering over the top to add a hint of colour e.g. sepia/black and white etc. I will be using a more sepia style layering so that it adds to the 1950s style/look I am trying to create within my music video- This will finish off the overall image styling and hopefully look very effective throughout.
 How will this help for my music video?
Researching into the equipment will help me because knowing what I will use allows me to familiarise myself with this software and hardware before creating my music video. This way, when it comes to creating my actual video I will know how to use everything and therefore can have a quicker creation process and use the programs/camera etc to the best of their ability to get the best shots and editing techniques.
Analysis of artist advertisements
How will this help for my music video?
As well as creating a music video, I also and required to create promotion methods such as an album poster- as with everything, analysising real products will give me a sense of the layout and structure which I can then replicate with my own work to make it look as real and effective as possible. I analysed two very contrasting posters; one of which being for a pop artist and the other for an alternative rock band. As my own video will be the music of an alternative rock artist, this will help even more and I can understand the typical form of this genre which again, I can incoporate into my own.
Analysis of previous A2 work
Final music video for vimeo from Ria on Vimeo.
I think that Ria's music video is a very good one and something that you could typically picture as a music video for a Birdy song. The overall style fits the song perfectly which makes it feel more engaging and realistic for an audience member. You can instantly tell that there is a 50s styling of the actress due to the hair and makeup however it is more subtle than the styling I will be using for my own.
Ria has added an intro to the music video of birds tweeting- this then links to the overall theme of nature from the whole video and also seems to create a calming feel before the main video has even started. The first shot of the actress we see is a high angle and she is looking up and is surrounded by trees instantly you get a feel for the overall music video.
Ria uses the camera very effectively and ensures that she just shows the audience what she specifically wants to for a reason. For example, multiple times she shoots just the actress' shoes (small brown boots to fit with the overall styling) walking along a wooden bridge. The small bits of mud, dirt and leaves that are stuck to her shoes supports the naturistic feel and gives the video a very innocent, idiolistic feel.
Throughout the music video, it cuts back to an older lady in a cottage, waiting for the girl to return. She appears to look very sophisticated and as she is stood in an arched window it gives the impression of religion.
As the song is quite slow, all of the cuts and camera movement are slow. It creates a calming feel and keeps it 'mellow'. Even though the camera shots are very still, there is slight movements within the leaves, trees from the wind create effective shots and then the walking of the actress highlights this even more.
Whilst the actress is walking along, she is constantly looking around as if she is searching for something/someone; this then mixed with the shot of her looking into the lake at her reflection suggests she could be 'searching for herself' which gives a more symbolic approach to the music video.
About three quatres of the way through the music video we see the girl arrive at the cottage where the other lady was- this is shown through a panning establishing shot showing the whole cottage before seeing her walk up the path to be greeted by the woman at the door who swiftly sends her away after looking her up and down. This is shown through shot-reverse-shot of the woman looking down, then the camera pans up to show the girls entire outfit and this then goes back to the woman who appears to then start shouting at her. Because of the way she is 'judged' by the woman, it completes the story and tells the audience that this is possibly her mother or another family member that is shocked at what she is wearing in comparison to the older lady wearing a very classy, black dress. The video then ends on the girl running away from the cottage and shot of the woman back at the arched window looking out before a fade to black.
How will this help for my music video?
Analysing a previous A2 student's work will help me to understand which is actually doable for a students work and I can use elements of their work within my own. This video in particular as it's quite similar in the way I would like to do my own: 50s stylling, quite innocent, not green screened, follows a story etc. Analysing one that will be similar will help me even more because I can shoot in a similar way to create the same overall effect. Moreover, I can learn how certain techniques have been used such as a colour overlay on the entire music video, particular camera effects and editing techniques.
Sunday, 15 September 2013
Hair Trial
Below are the images I took whilst trailing a 50's hair style. I took my models hair and slightly back combed her fringe so it was easier to style, I then rolled it round so I made a sausage type appearance which I secured with clips. I then simply tied her hair up in a pony tail and put in a patterned hair tie. I think this is the style I will use as it was easy to create and yet looks effective an sticks to the hairstyles of the 50s I have seen in my research.


How will this help for my music video?
Completing a hair trial for my music video before the actual shooting will help as this means I won't have to worry about part of the stylling as I wil already know what to do. Also, doing it early means that I could experiment with different styles until I find the one that will be perfect for my music video and comply with the overall theme and style. I can then develop this and get audience feedback by asking open ended questions such as 'What era does this hairstyle fit with?' rather than already telling them what it is supposed to be like.
Completing a hair trial for my music video before the actual shooting will help as this means I won't have to worry about part of the stylling as I wil already know what to do. Also, doing it early means that I could experiment with different styles until I find the one that will be perfect for my music video and comply with the overall theme and style. I can then develop this and get audience feedback by asking open ended questions such as 'What era does this hairstyle fit with?' rather than already telling them what it is supposed to be like.
Subscribe to:
Posts (Atom)